
How do I create a chart?
There are two ways to create a new patient chart. Read on for a step-by-step guide, or watch a video here:
1. From the ''Shortcuts'' menu, go to the "Quick Links" section and select "Create a chart" from the "Go to..." drop-down. 
Or...
1. From your main dashboard, click on "Charts." 
2. Click "Add a chart" from the "File Cabinet>Roster" section.

3. Fill out the required information: the patient/client's first name, last name, and branch. 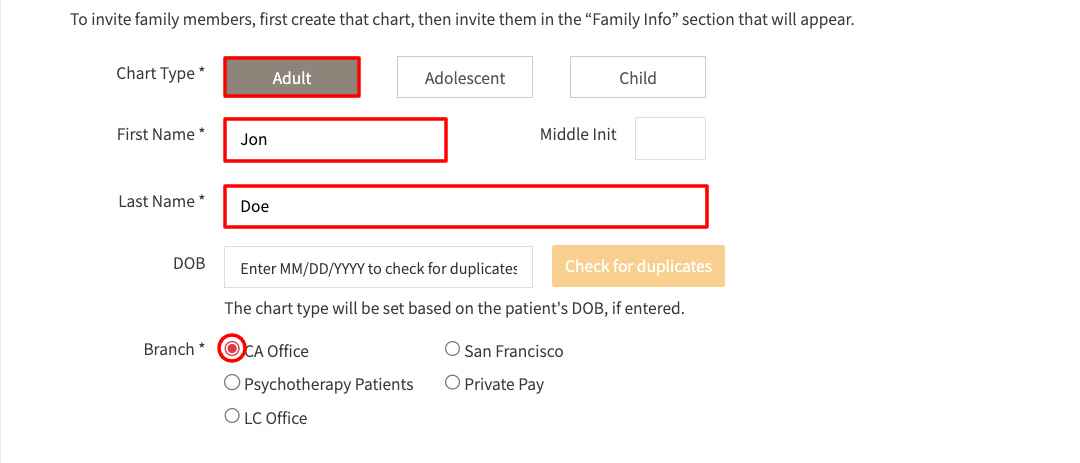
4. Add an email address.

Note: If you attempt to save a chart in Luminello using an email address that is already in use in your practice, you will get the error message "Oh no! This email address is already associated with a chart in your practice." Check out this article for a workaround for Gmail accounts."
5. Check the "Invite to Luminello" box to invite your patient/client to create a portal account.

Your patient/client will receive an invitation that will look like this embedded link.
6. Your default portal permissions will populate for the patient/client in the "Portal Permissions" section. However, you can manually adjust them anytime. The patient/client will have access only to those areas you have granted them access.

7. Be sure to click "Save." Or you can click "Save & Create Another Chart" if you'd like to create another patient/client chart. 
Note: To create a chart, your default branch information and Tax ID must be completed.
If you have any questions, please contact us.