
How do I create an invoice?
If you're looking for the fastest way to create invoices in Luminello, that would be using our auto-invoicing feature. However, if you prefer to create invoices manually, this guide will walk you through the steps to create an invoice from scratch.
Within a chart's "Billing" section
1. You can use the ''Shortcuts'' menu by selecting the chart and clicking on ''View billing'' from the ''Go to'' dropdown. 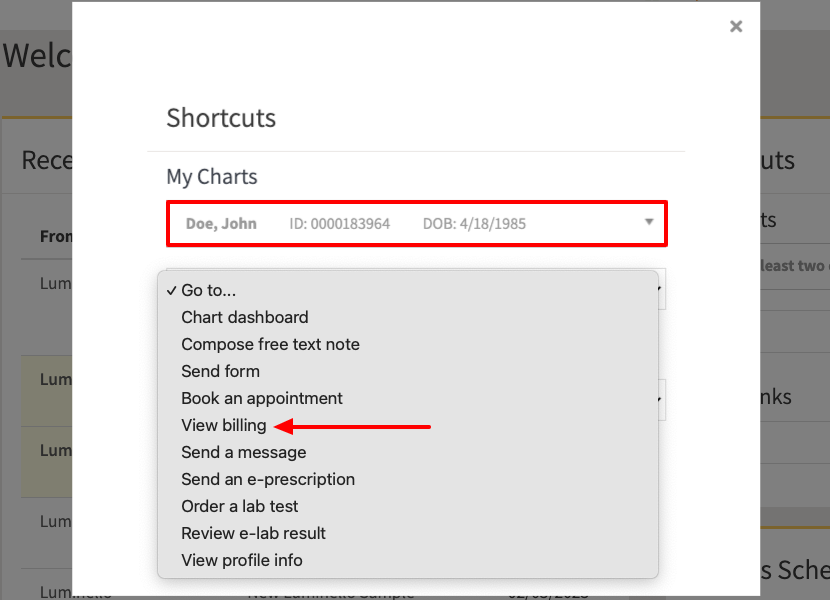
2. Go to the drop-down menu next to the transaction you want to create an invoice with, and click "Create invoice." 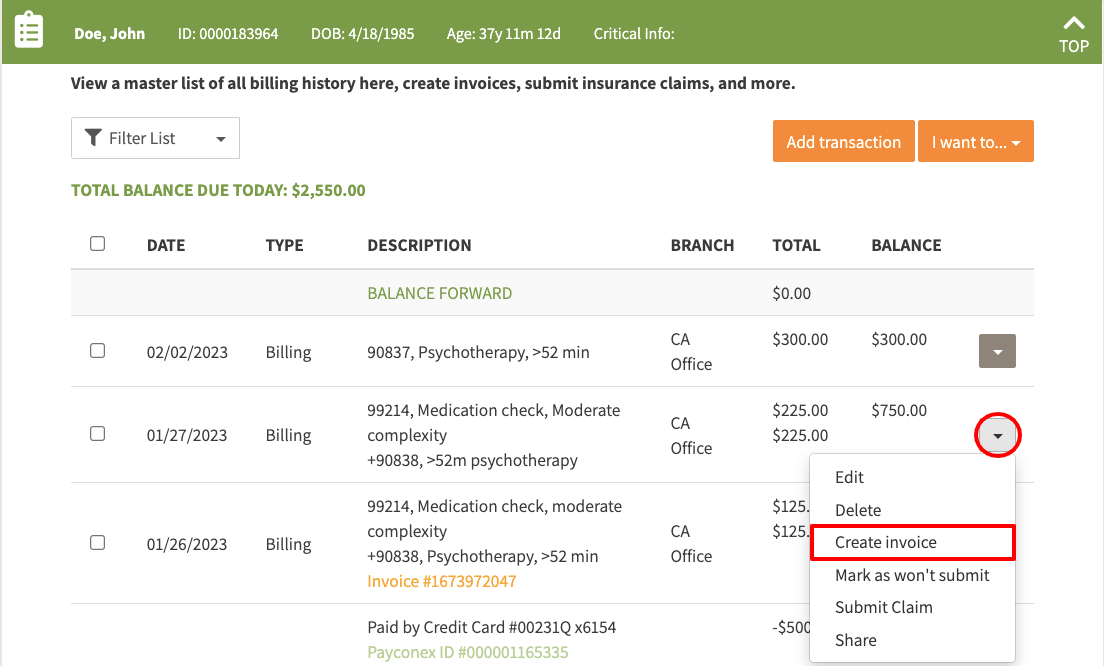
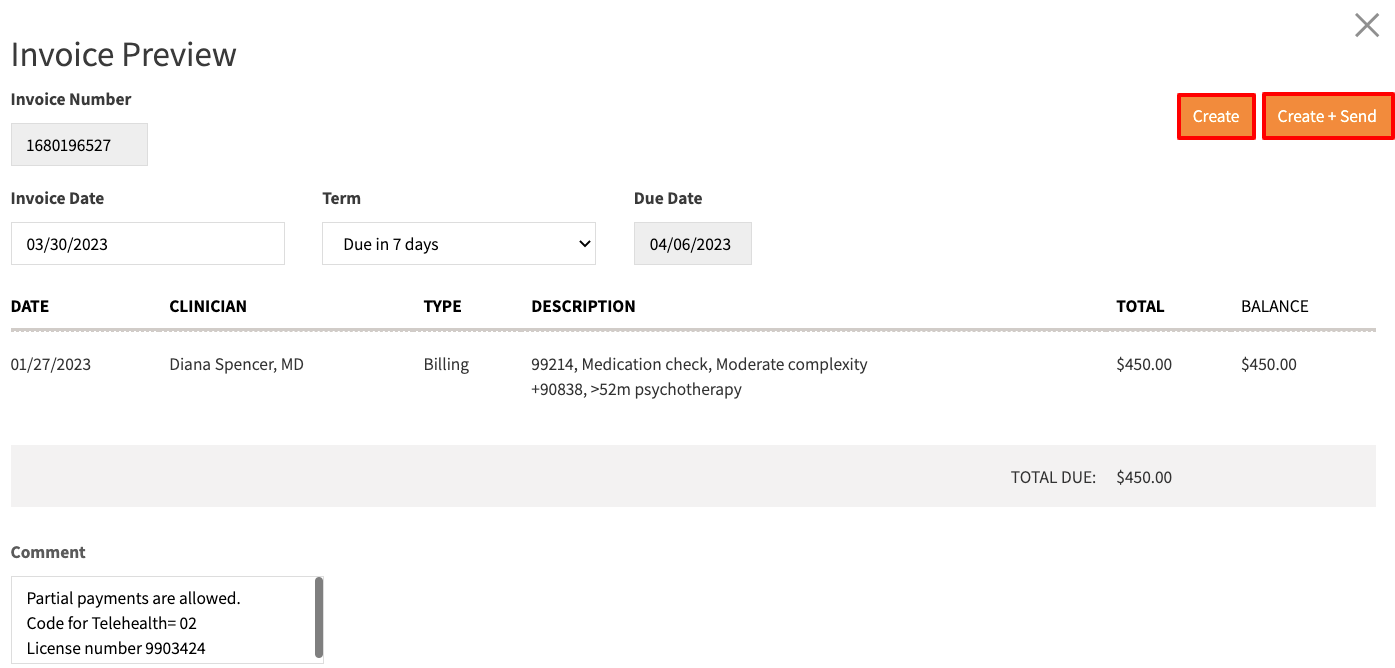
3. In the invoice preview screen you can see the invoice details, such as the amount, invoice date, term, and comments. To create the invoice, click on "Create," or "Create + Send" if you want to create the invoice and send it to the patient's portal.
Note: You can add a default "Term" and "Comment" by adjusting your invoice settings.
4. If you'd like to create an invoice for more than one transaction, check the boxes next to each transaction you want to create an invoice with, and click on the "I want to..." drop-down. 
5. Go to "Invoice," and choose "Create new." 
Within the "Financial Summary" section
1. From your main dashboard, click on "Financial." 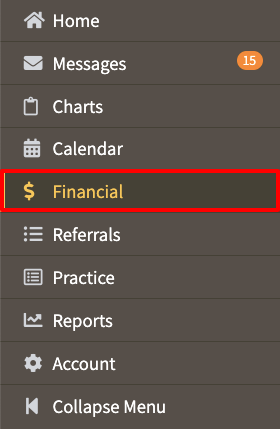
2. Go to the "Financial Summary" section, and toggle to "All Transactions." 
3. Enter the patient's/client's first and last name, or chart number in the search box and choose the one you want to create an invoice for from the list. 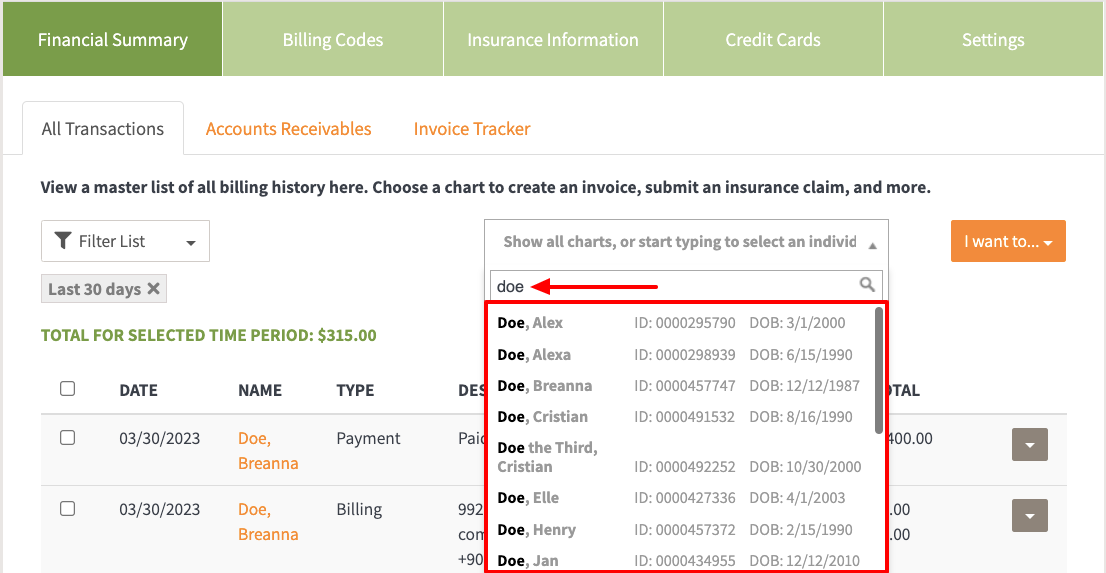
4. Check the box next to the transactions you want to create an invoice with, and click on the "I want to..." drop-down. 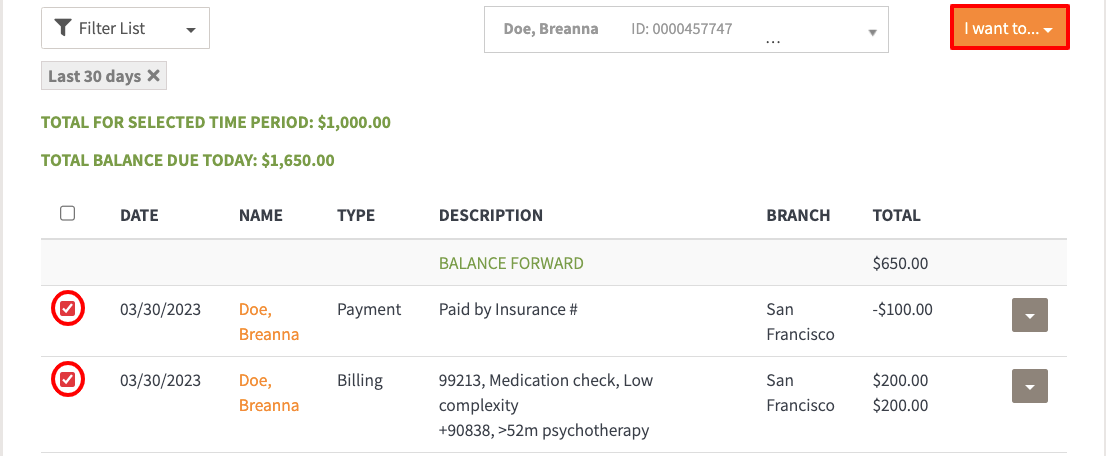
5. Go to "Invoice," and choose "Create new." 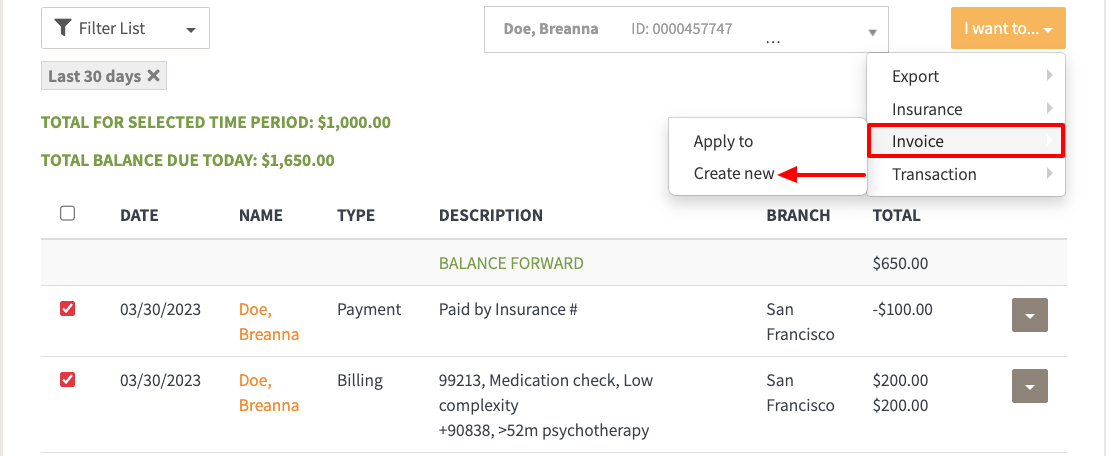
Note: To learn how to enable auto-pay for invoices not paid in full, check out this article.
If you have any questions, please contact us.