
How do I order an e-lab?
The use of e-labs systems is to assist clinicians in the ordering of diagnostic tests that are conducted in a controlled manner, such as imaging and hematology. E-lab systems provide a framework to capture and communicate laboratory data to reduce the likelihood of redundant tests while supporting timely decision-making.
See below for a step-by-step guide or watch a webinar about managing the e-prescribing and e-labs features here:
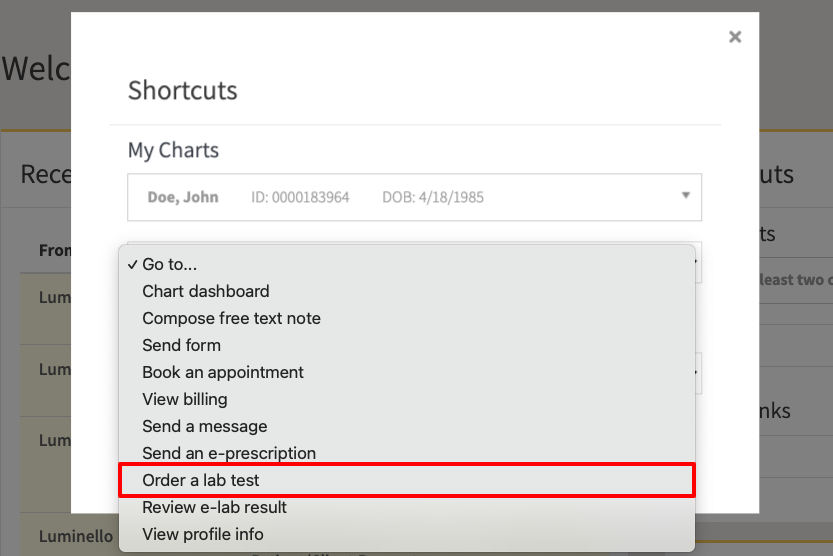
1. You can use the ''Shortcuts'' menu by selecting the chart and clicking on ''Order a lab test'' from the ''Go to'' dropdown.
Or...
1. Go to the "Labs" section of a chart, and toggle to "Send e-labs."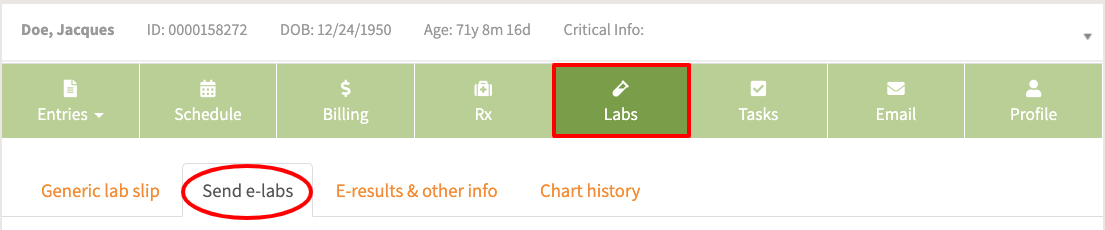
2. In the "Order type" drop-down, select "PSC." This stands for "Patient service center." 
3. In the "Bill Type" drop-down, you can choose:
- Patient: if you want the patient to be billed for this lab order.
- Third Party: If this order will be billed through the insurance company.
- Client: If you want to assume any charges for this lab order. This option is typically used if you have a pre-existing relationship with a lab.
Note: The bill type will be determined based on the information provided to Change Healthcare. For example, if an insurance code was provided and the payer was found in Clinical Network, bill type would be set to Third Party. If Guarantor info was provided, then bill type would be set to Patient. In all other cases, the bill type would be set to Client. 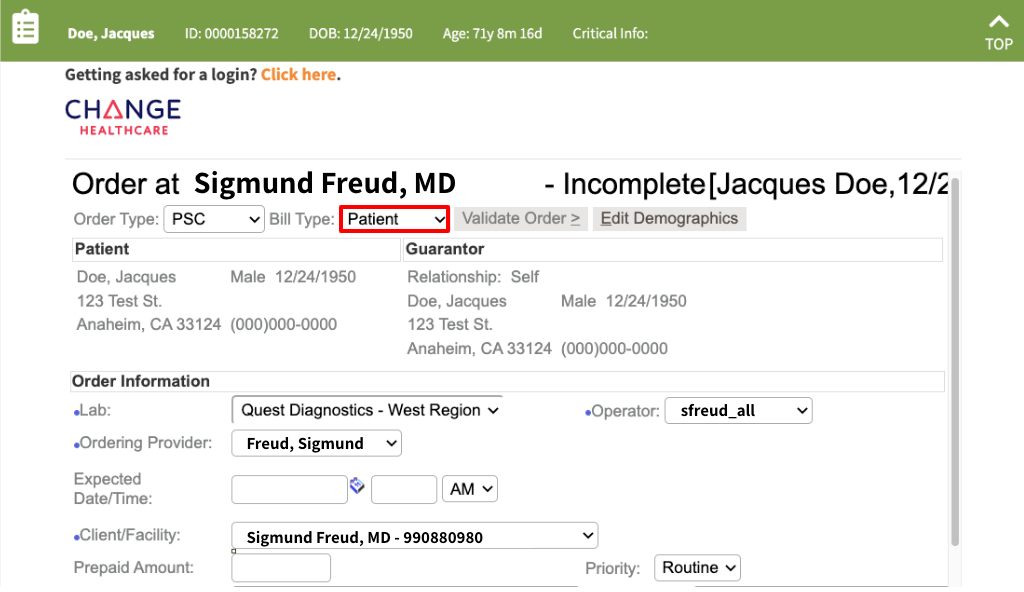
4. If you want to update any detail about the patient or guarantor demographic info, you can do it by clicking on "Edit Demographics." 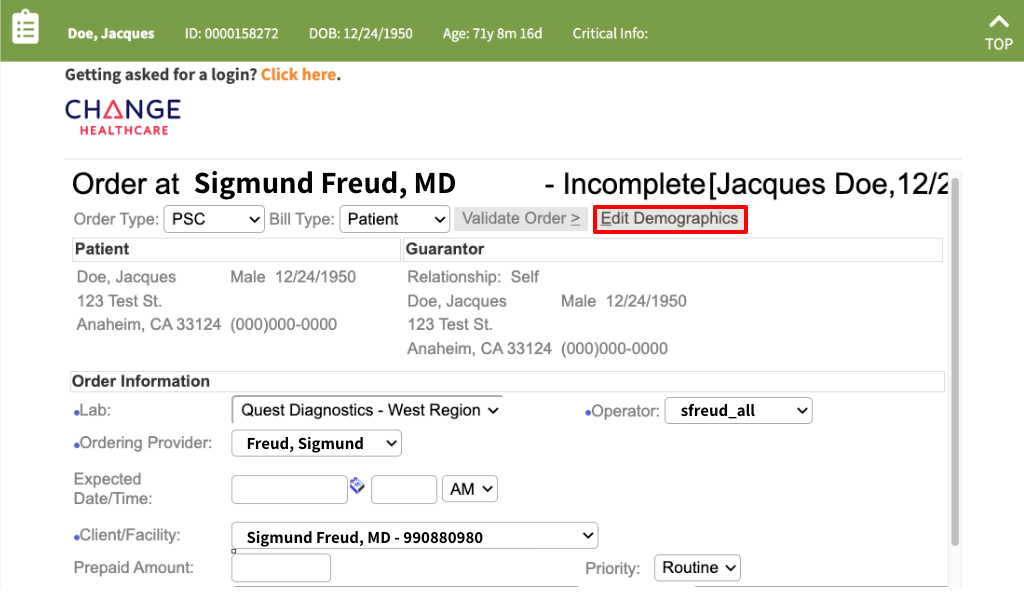
5. In the "Order Information" section, the "Lab," "Operator," "Ordering Provider," and "Client/Facility" are automatically populated with your information. However, if you use more than one lab, you can switch between your labs in the "Lab" drop-down. 
6. Scroll down to the "Test(s)" section, and type in the test code in the search bar if you know it by heart, or click on the "binoculars" icon to search for any code.  7. If you click on the "Binoculars" icon to search for a test code, type in the test name in the "Description" field, and click "Search."
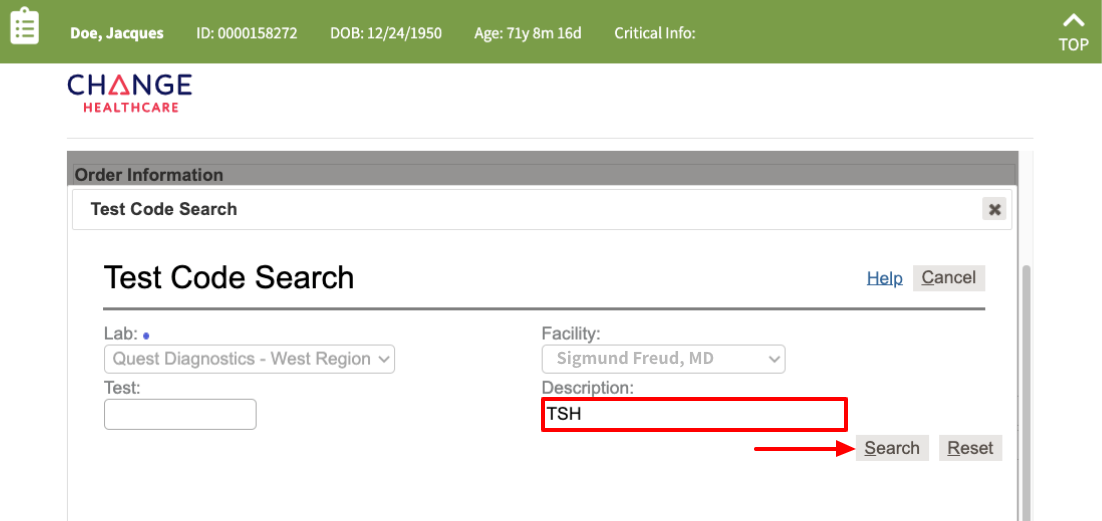
8. Check the box next to the code you want to use, and click on "Use Selected." 
9. You will be taken back to the "Test(s)" section, where you will find your recently selected test, marked down. 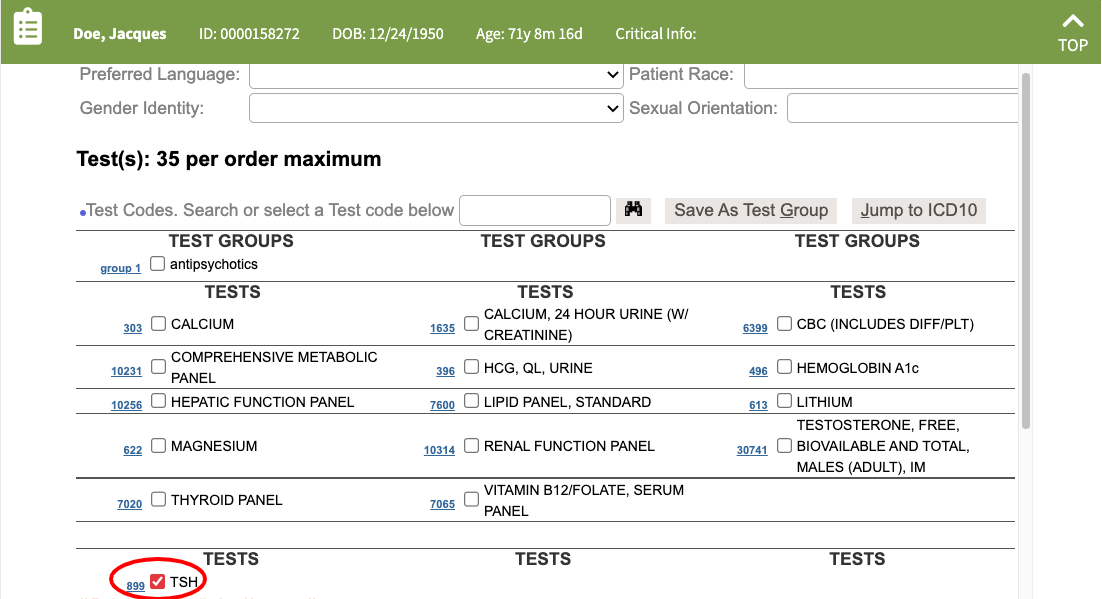
10. You can choose "Use Selected & Save to Preferences" if you will be using this test code on a recurring basis. So, next time, you can choose it from the list instead of searching for it each time. 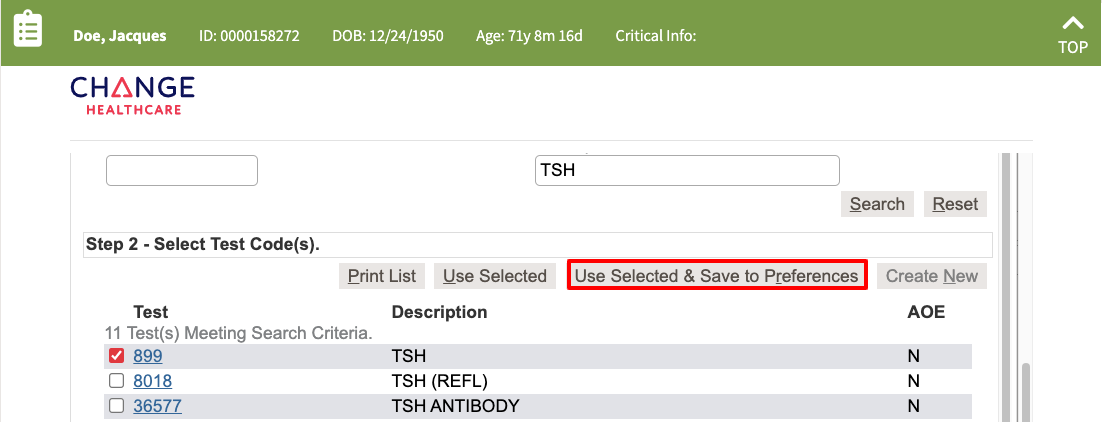
11. The "ICD(s)" section will display the diagnosis added to the chart. However, if you want to remove it from the order, you can uncheck the box next to the diagnosis, and type in a new one in the search bar, or click on the "Binoculars" icon to search for any ICD code.  12. Scroll down to click on "Validate Order."
13. In the order preview screen you can confirm the order details, and download a PDF copy of the order. Click "Send" to send the order to the lab. 
If you have any questions, please contact us.